Planck Keyboard
The Planck keyboard is a radically minimalistic approach to how he interact with a computer. You only get the essentials. No arrow keys, no numpad, no numrow, no function keys – nada. I’ve been using this keyboard almost every day for the last six months and in this post I‘d like to share my experience with it.
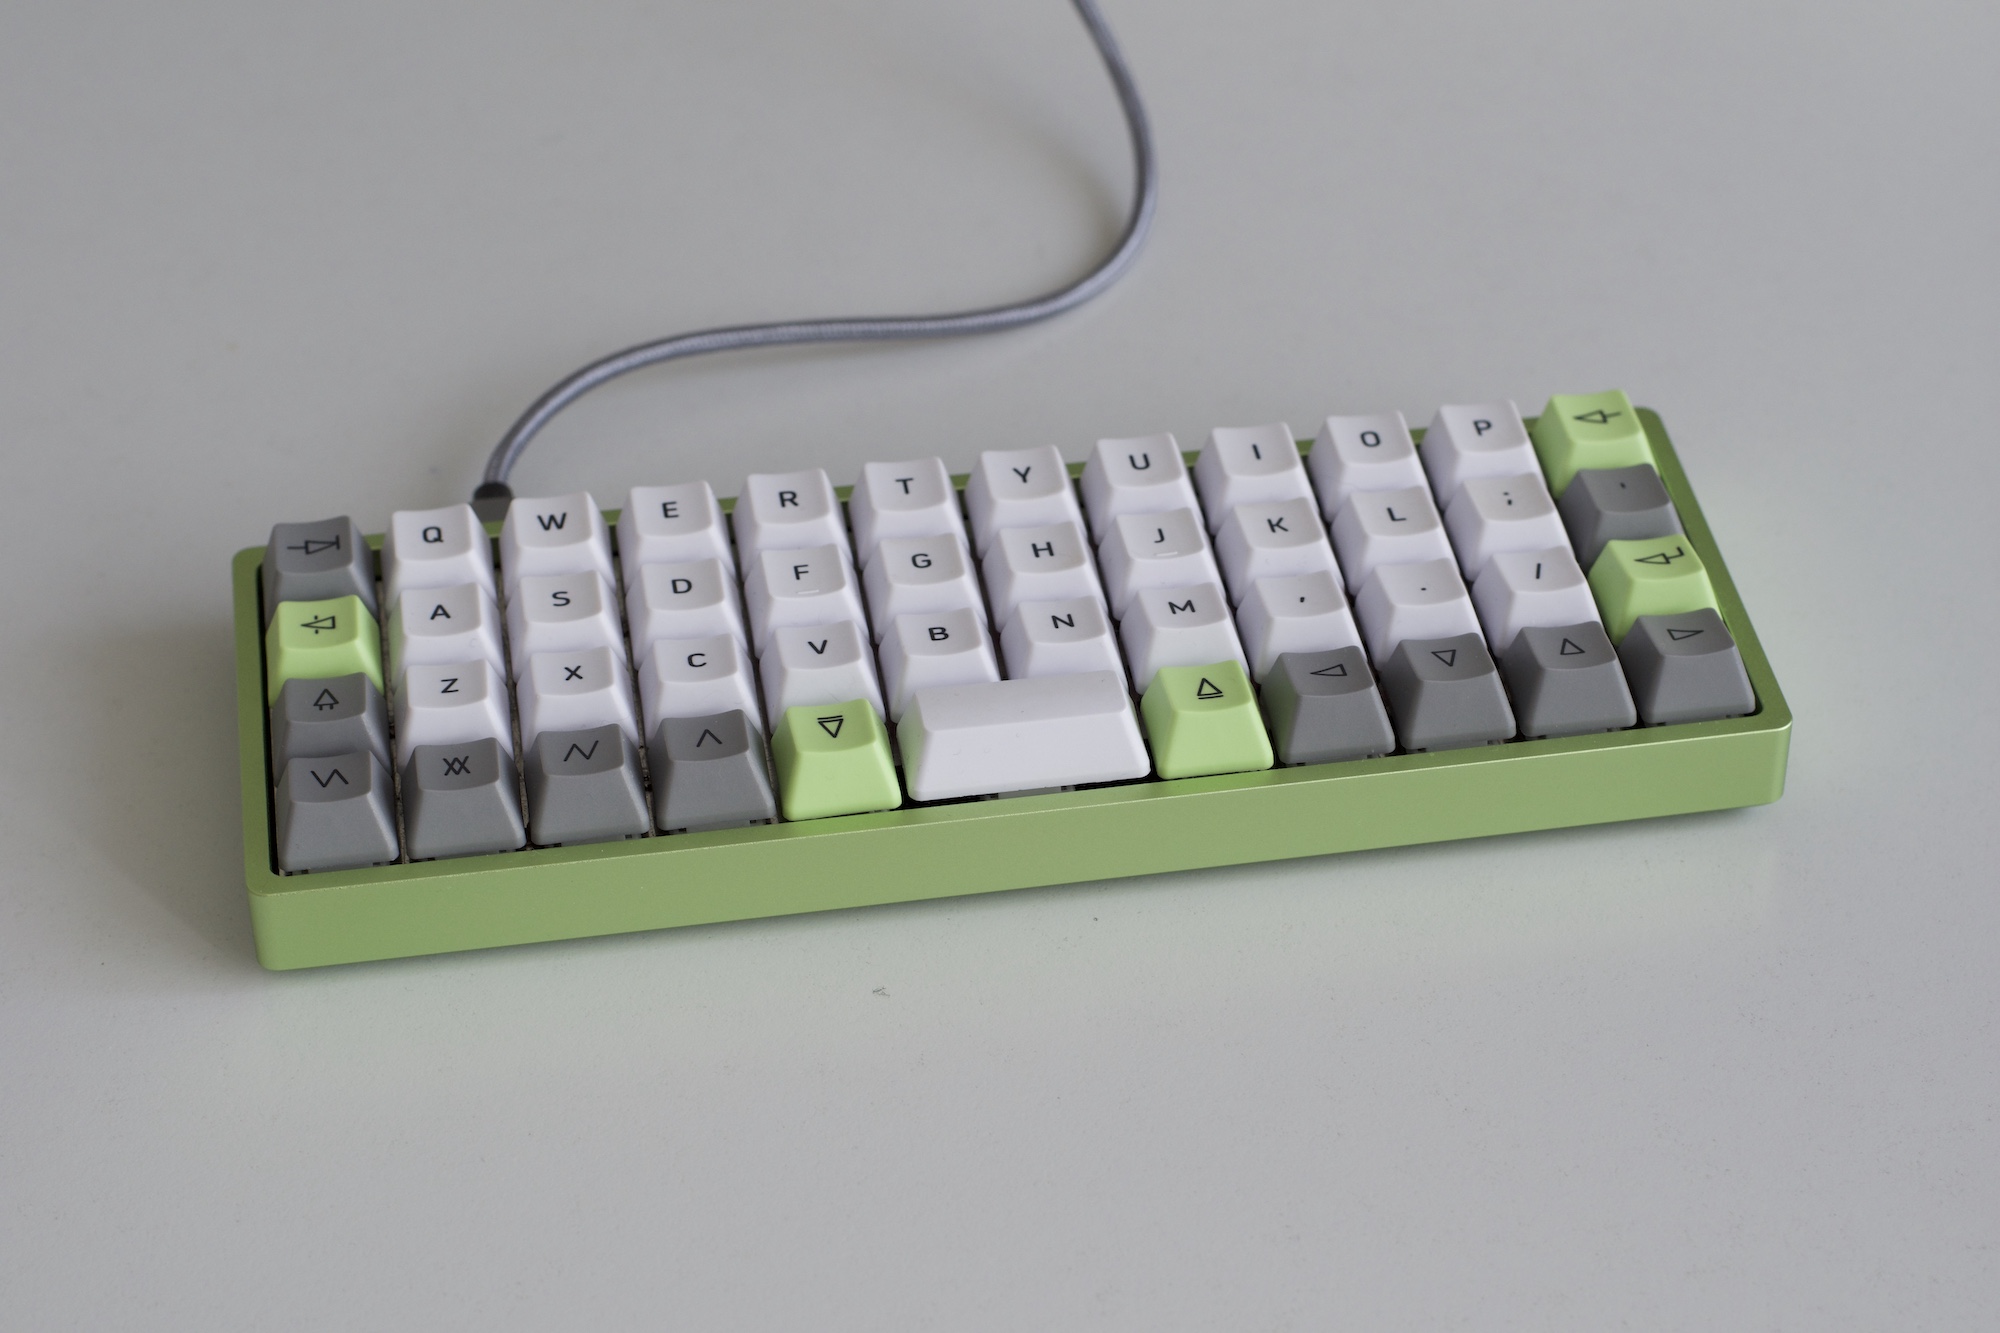
This post is written from the perspective of a software engineer working primarily on a Windows machine and keyboard usage might differ from that of an average user. This keyboard has plenty of features like RGB lighting, beeping, support for rotary encoders and so on, but I will focus solely on those I have personally used.
Hardware
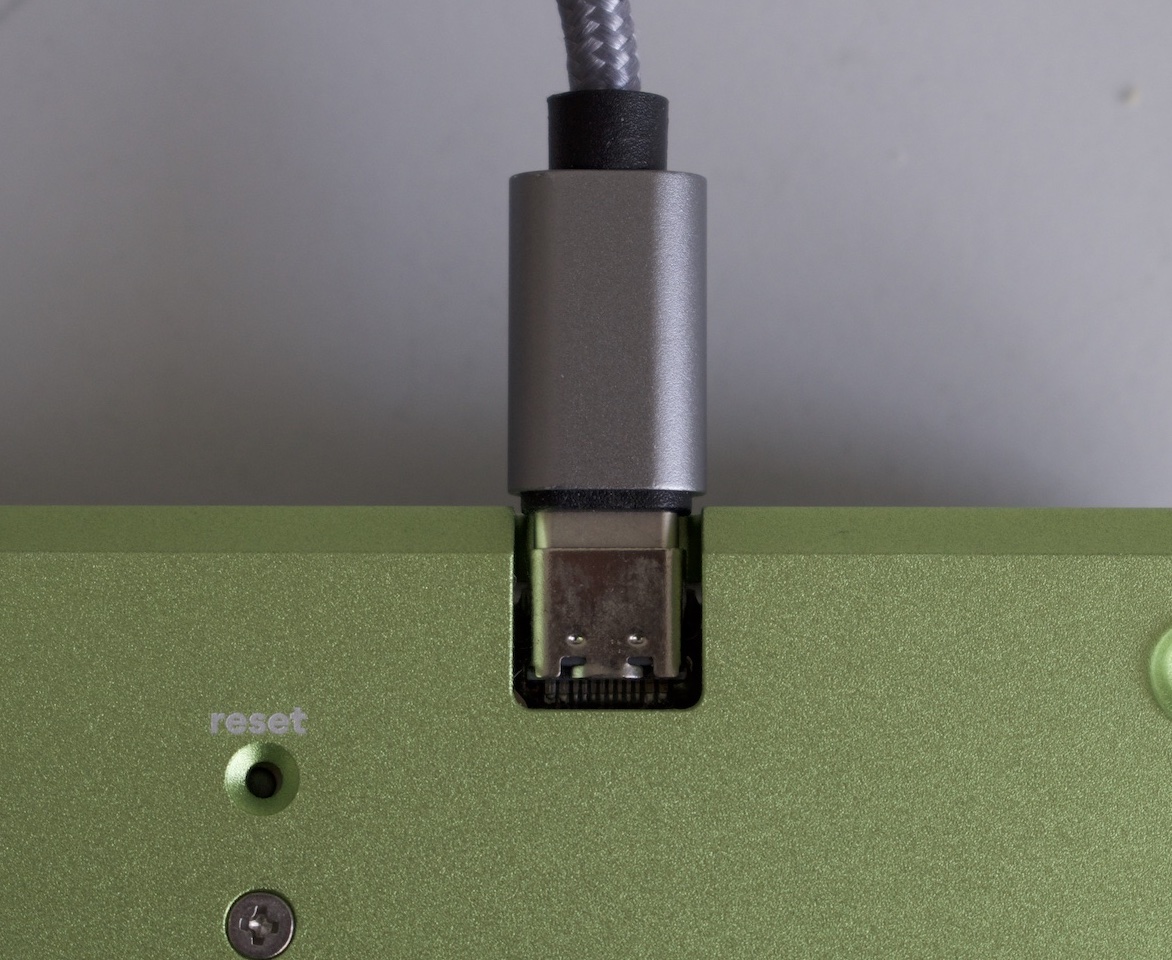
Planck keyboards come in many flavors and from different manufacturers. I opted for the most vanilla version and bought mine from drop.com as the OLKB (ortholinear keyboard community) website suggested. This is the 7th iteration of the product and I didn’t experience any of the flaws of the previous versions you might have read on the internet. The only design flaw that I can think of is that the USB-C port is buried too deep in the housing or the opening in the housing is too narrow, and some of the cables I have push against the housing and the connectors do not affix firmly to the port.
 |
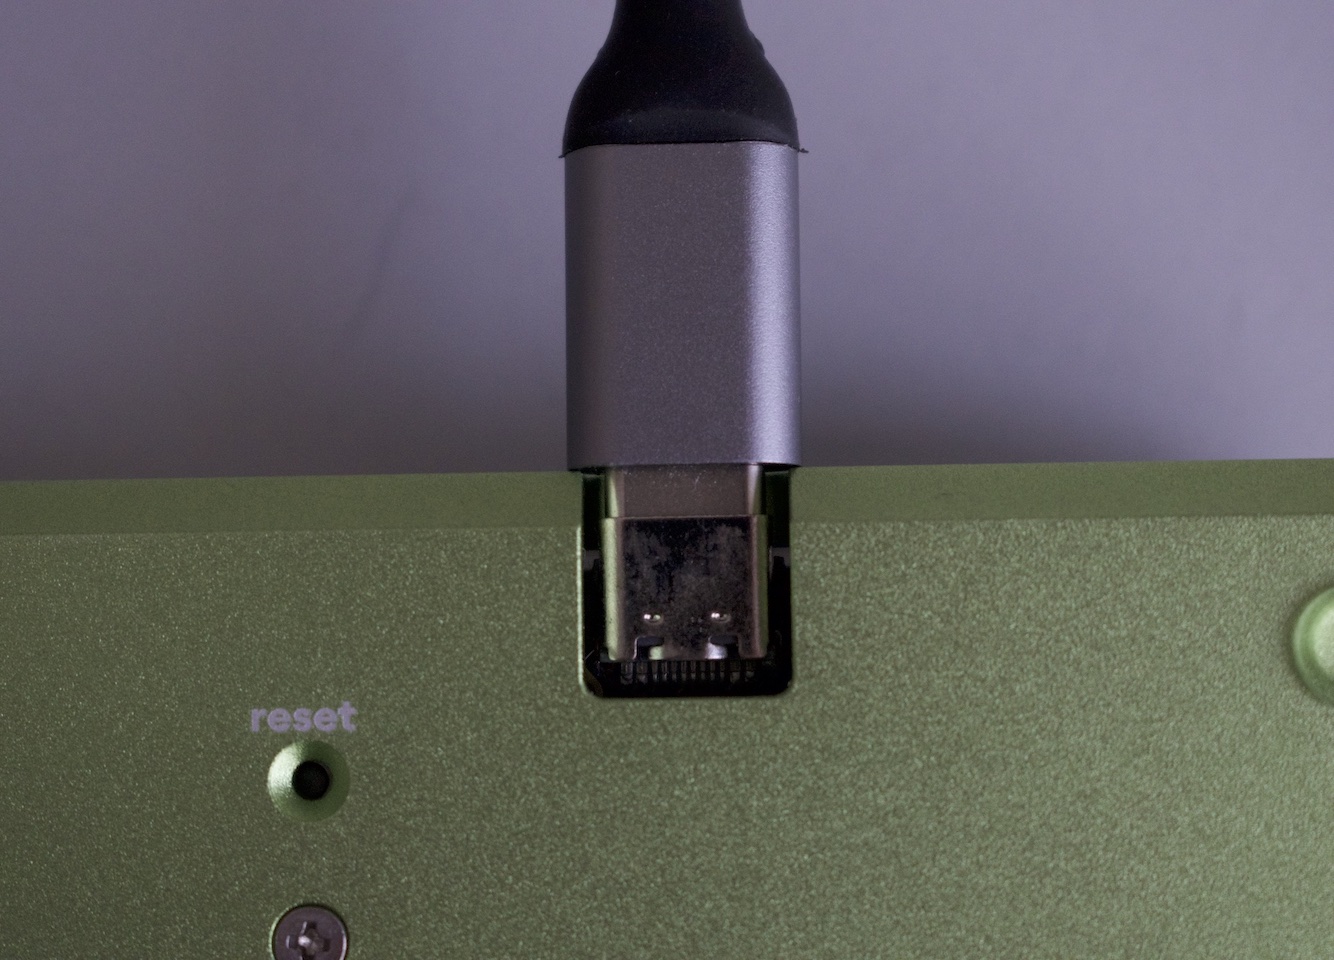 |
| Cable included in the kit does not touch the housing. | Another cable pushes against the housing. |
The package includes a circuit board, a heavy base plate (there is a lighter option) that will hold the switches, and the housing. These three parts need to be assembled with screws. No soldering is required. The resulting chassis is pretty heavy for its footprint and the build feels solid. I had some Holy Panda switches lying around but needed to order a special set of keycaps that included narrow modifier keys.
I went for housing made of green aluminum and keycaps with green accent. In my opinion, this is the most beautiful combination. The switches fit firmly into the base plate and the heavy chassis accentuates the „thock“ of holy pandas even more. As a result, this is the most pleasure I had typing on a keyboard.
Layout
The most notable thing about this keyboard is the orthogonal key arrangement. Usually, the rows on a keyboard are staggered. This design traces back to mechanical typewriters, where keys were physically connected to the hammers striking the paper in front of the keyboard. Today, even though there is no physical connection between the keys and the characters on the screen, we still use this layout. Even in on-screen keyboards (there are exceptions, see next paragraph). On this keyboard, however, the keys are arranged in a grid. Not only is this a more comfortable positioning for your fingers, it looks and feels modern.
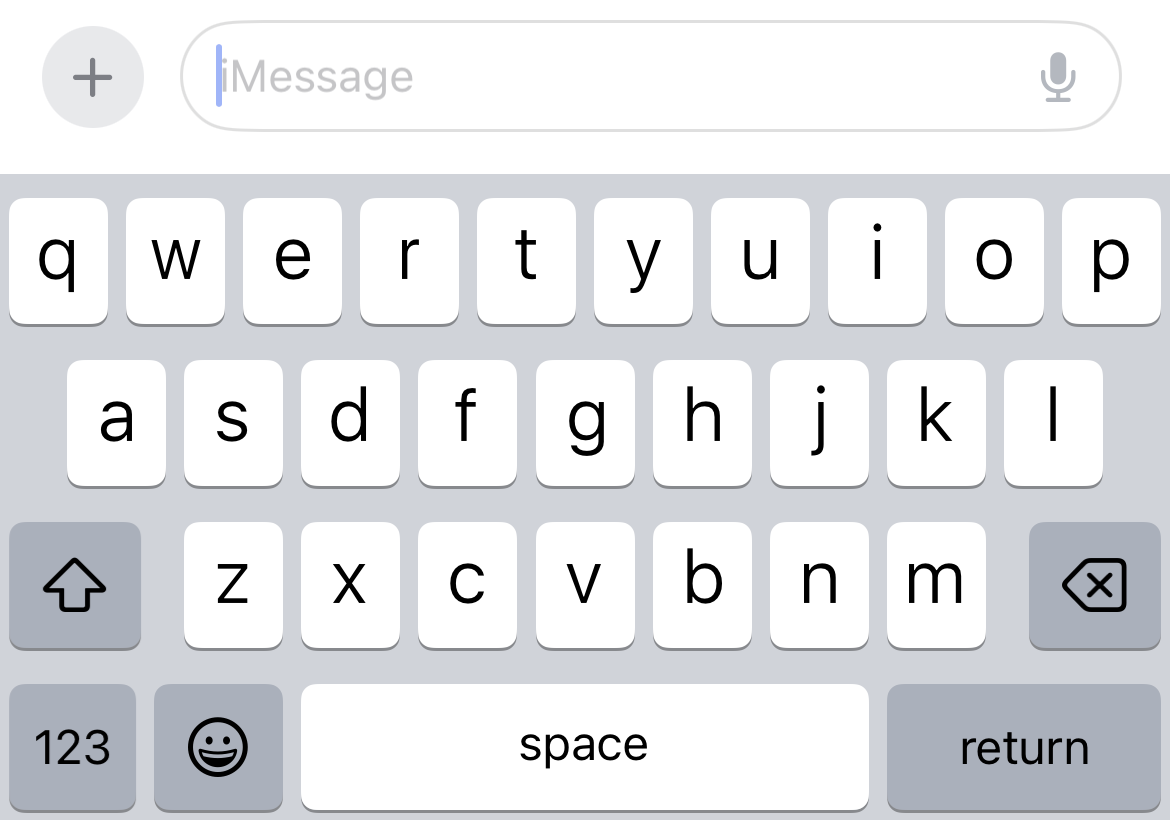
This is a 40% keyboard and the keyboard’s footprint is already very small. Additionally, all the modifier keys have the same width, namely 1u (1 unit, 1 key width). This is made possible by the orthogonal arrangement of the keys. If you have an iPhone and use a keyboard language with more than 26 letters, e.g. Swiss-German, you‘ll notice that the keys on the screen are also arranged in a grid (in vertical orientation) to make efficient use of the limited screen real estate.
 |
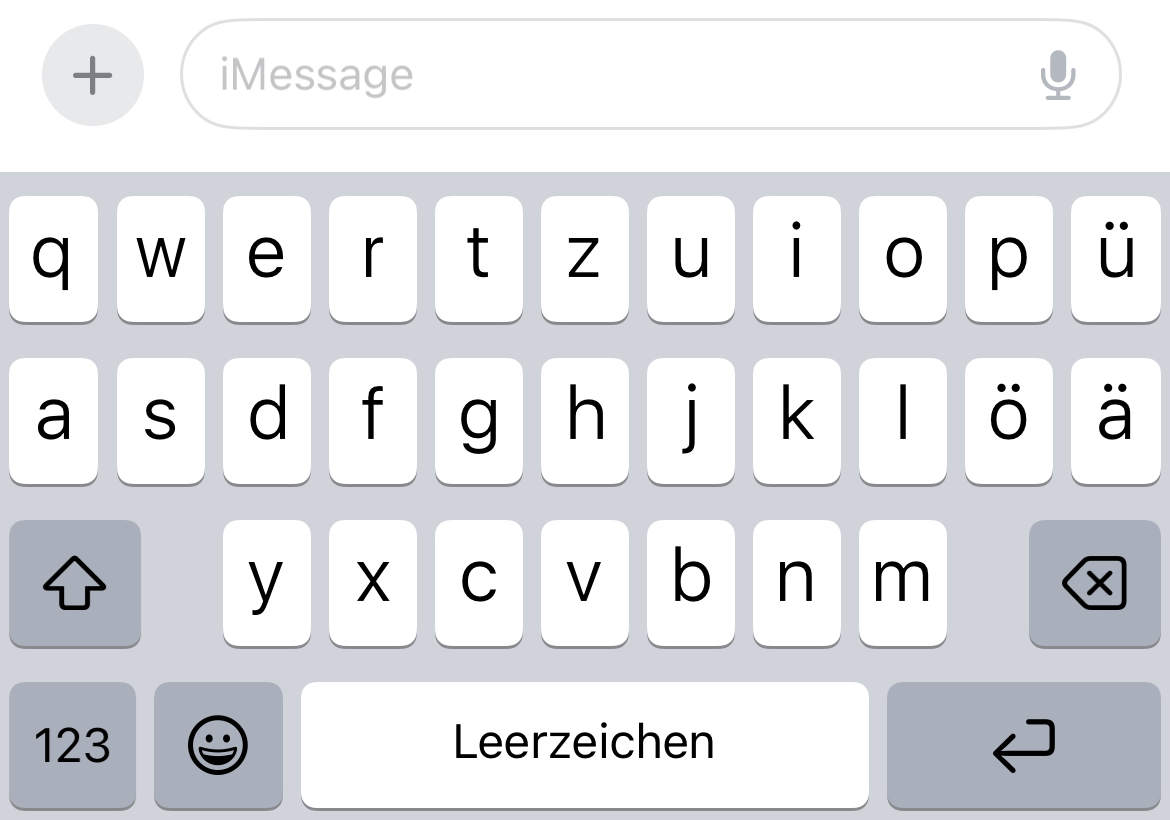 |
| English layout. Rows are staggered. | Swiss-German layout. The keys need to be narrower to accomodate the umlauts (Ü, Ö, Ä). A grid becomes the only logical arrangement. |
All other keys are hidden away in an upper and a lower key layer. The layers can be accessed by holding the respective keys left and right of the space bar. When a layer is activated, the keys alter their functions to represent the keys absent from the base layer.
Layout standards
Most of mechanical keyboards you find on the internet are made for the ANSI layout, primarily used in the US. Most other countries use the ISO layout. The standards are compatible in some aspects, but there are a couple of key differences:
- on ISO, the left shift bar is narrower and makes room for one additional key.
- on ISO, the enter key is narrower and higher, spanning 2 rows. There is no key above the enter key and one to the lower left of it
- on ISO, the right Alt key is named AltGr and does not mirror the left Alt key (Windows only)
These differences affect switch positioning on the circuit board and the base plate, the length of the stabilizers and the shape of the keycaps. This is not something you can fix programmatically, and you need to keep this in mind when purchasing the parts.
So, if you are from Europe and you are in the market for a mechanical keyboard, you usually have the following three options: 1) choose from the limited supply of the ISO-compatible keyboards, 2) accept using an ANSI keyboard with your language (reprogram some of the keys if needed) or 3) use the US layout and combine the missing letters using dead keys.
Since I use the Swiss-German ISO layout, the above options are very frustrating. It feels good to say that the Planck keyboard levels the field for all keyboard enthusiasts. It doesn’t care about layout standards and supports neither. Everybody will need to readjust.
Customization
Thanks to the orthogonal key arrangement and the keyboard size, your fingers never need to travel more than two keys from the home row. Therefore, you also don‘t need to move your wrists from side to side as much as on a normal keyboard. If you are typing a lot of text, your wrists will thank you, in theory at least.
In reality, though, the default layout isn‘t comfortable for typing. For example, note that there is no right shift key. This means that if you want to type an uppercase „A“, you‘ll have to move your wrist to press the right shift key with your pinky and the „A“ key with your ring finger. And if your alphabet consists of more than 26 letters, you will need to search for the superfluous letters in the upper or the lower layer.
Luckily, though, the Planck keyboard is programmable. It has a QMK-compatible processor, and any key may be reprogrammed. With that you are free to configure your own layout. For use with language layouts other than English, this is a game changer because you can put the most important keys on the base layer.
Creating your own layout is a bit of a hassle, though. You need to download a git repository, create your layout or find someone else’s that is already available in the repository, compile it, and flash the keyboard. There are plenty of guides on the internet, and they are pretty easy to follow if you are a mechanical keyboard enthusiast (or a software engineer). But for a novice, this might prove difficult.
Programming your own layout will most likely require moving keys away from the base layer to make room for keys that are more important to you. Take the right shift key for example. To keep the key in the correct spot under your right pinky in symmetry with the left shift key, you need to move the enter key somewhere. If you happen to decide that you absolutely need the “’” key above (that’s where “Ä” is in German, pretty important), you’ll have to move the enter key down into the corner and replace the right arrow key. Which, in turn, cannot be moved alone. The whole arrow key block needs to be repositioned (or reshaped, but moving the “.” key is most probably not an option). And from there, it all snowballs to the point where the labels on the keycaps don’t mean anything anymore. I wanted to use this post to describe how I configured my keyboard for comfortable use with the Swiss-German layout but this post has already gotten too long of a first blog entry. That is probably a topic for a future post.
Side note: The Planck keyboard has a bigger brother – the Preonic. It offers an additional row in the grid, 5x12 instead of 4x12, meant to be used for number characters and two function keys on each side. I imagine it would give a little more room to map the important keys to base layer. But what’s the point of going minimalist if you can’t go full minimalist?
Pitfalls
Customization is a double-edged sword. On one hand you get incredible flexibility and you may adjust the keyboard to your liking. But on the other hand, you taylor the keyboard to yourself and no one else. No other person will be able to borrow your keyboard or use your computer. Remember, some of the functionality is hidden away from the base layer and the keycaps don’t match with the programmed keys anyway. In the end, you will have no choice but to put your toy away and bring out a normal, grown-up keyboard.
The same applies to you too. Any muscle memory you may have acquired on a normal keyboard is no longer applicable on the Planck keyboard, and vice versa (albeit to a smaller extent because on normal keyboards, the lables on the keycaps usually match the underlying function). This is especially problematic for passwords that contain numbers and special characters, which on a Planck keyboard are tucked away in another layer. To make things worse, keep in mind that the password fields are masked, and you cannot check what you are typing.
Conclusion
I truly love the Planck keyboard. It looks and feels gorgeous, and I applaude its radical minimalism. Depending on what you do, you can probably configure it for productive work with only a few adjustments. That being said, there is no way around the fact that you need to press more keys to perform the same action. If you are a power user and rely heavily on muscle memory, shortcuts, and special characters, you will feel constricted.
Final thought
The absence of most of the keys is less prominent when working on a device that was never designed to use these keys, e.g., an iPad. The Planck keyboard offers more keys than the iPad’s on-screen keyboard, and it’s much more pleasant to type on. The iPadOS is already so restrictive that the Planck keyboard’s minimalism doesn’t bother anymore. And if someone would want to borrow your iPad, they will always have the on-screen keyboard. I think that makes the Planck keyboard a ideal mechanical companion for an iPad.